Written by: Anne Gavin
What I really want to know after viewing Episode 2.11 – “Is there anything that Diana Gabaldon CAN’T do?” Lots of good stuff in this episode, but the news is “Best Selling Novelist Writes TV Script.” So, I’m not going to bury the lead here. Let’s just call it out. The novelist showed she was more than up to the script writing job even after admitting that the collaborative process involved was challenging and out of her comfort zone. However, even nay-sayers have to agree that there was something different, something subtle about this episode’s script that many of us book readers recognize as vintage Diana Gabaldon. No_One_Else understands these characters better than Diana. And, the subtle bits of humor in what was overall quite a dark narrative, again, screamed Diana Gabaldon. It’s not a coincidence and it’s not Ron Moore propping up Diana. However, contrarians love to be contrary, so it’s wasted effort to argue. The episode, in fact, speaks for itself. So, let’s get into it…
Read more after the jump…
The Title Card. The first thing we see and as it turns out the last thing we see…sort of. But, more on that later. We start off the episode with Claire’s voice-over explaining that months have passed since Prestonpans and the Jacobites seem to have been enjoying some success. However, notably they have failed to increase their overall numbers of troops. Another thing that hasn’t changed is the incessant arguing of Bonnie Prince Charlie’s War Council. Now encamped in Northern England, Charlie and Jamie are outnumbered by those who wish to turn back to Scotland rather than march forward and attempt to capture Britain’s capital city. Jamie’s reasons may differ a bit from Charlie’s because Jamie knows the devastating psychological damage a retreat would cause his already reluctant troops. Jamie’s retort to an about face back to Scotland — “All hope that currently resides in the hearts of our supporters will be filled with doubt and fear.” And, any hopes Jamie had of altering the history books somehow with regard an advance to London, are dashed.

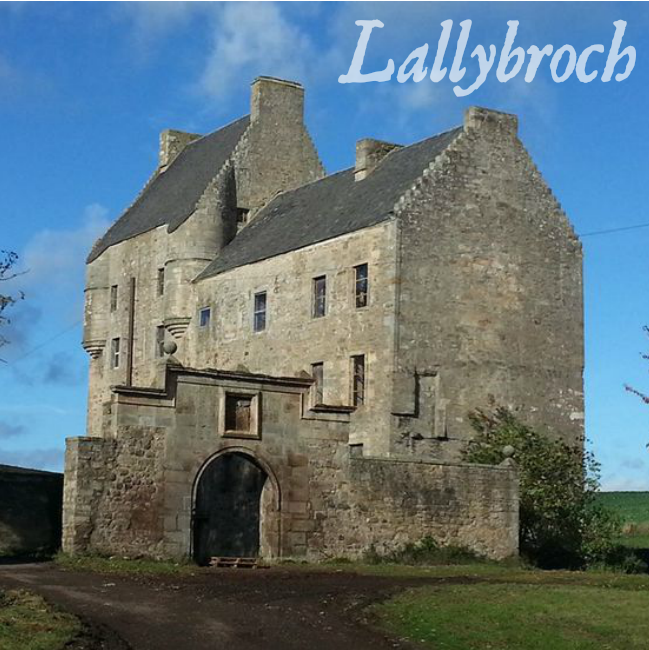
Meanwhile, Claire, Murtagh and Rupert wait anxiously for word from the War Council. Claire is otherwise engaged with the medical needs of the encampment – namely yanking rotten teeth. While poor Rupert muses aloud about his dearly departed friend, Angus. And, Murtagh does what he does best – scowls as he stares at the closed door to the War Council room. As Charlie bursts out of the Council Room with a look to kill, General O’Sullivan trails after him and Jamie emerges grim-faced as well. It appears the die has been cast and the crew is headed back to Scotland. Score one for the two Old Guys. Jamie seeks to comfort Claire and the men of Lallybroch that the decision to turn back means getting closer to home where they intend to camp for winter. Again, Jamie shows that he understands what it means to be a leader of men. Tis both the heart and the head that need tending when engaged in the physicality of war.
The first glimpse that this Episode was Something_Different comes next when the scene shifts to a sleeping Claire and Jamie standing next to her. He recites a prayer calling on God to protect his “white dove” and the “child she might bear one day.” This
Gaelic Prayer was lifted straight from the pages of “Dragonfly in Amber” and shows us that Claire’s safety is never far from Jamie’s mind as he likely starts to contemplate ever more deeply the possibility that the abyss at the bottom of Culloden Moor is inevitable. I was hoping there might be more (ahem) to this scene…but unfortunately, cuddles were all we got. That said, this was our Jamie and Claire and the love between them unmistakable. It reminds us of the story that we love and the real heart of the Outlander novels which is the epic story of our couple. I love that Diana included this scene in the script.

However, the peace of the night before is broken rather dramatically when Dougal bursts through the door the next morning and announces that Charlie and the Old Guys took off with orders for Jamie to proceed to Inverness. Essentially EXILE for Jamie, according to Dougal. Apparently, the Old Guys don’t like the influence that Jamie holds over the Bonnie Prince. With no choice but to follow orders and lead his men forward, Jamie and the Lallybroch men head north. And, there is no mistaking they are back in Scotland with the stunning scenery as backdrop to their trek.

And, because this is The Frasers, chaos soon breaks out when shots explode across the exposed camp as Red Coats are revealed to have discovered the Jacobite encampment. The men scatter towards the woods while Jamie, Claire, Dougal, Fergus, Rupert and Murtagh mount their horses. As the chase ensues, I’m left to wonder “who are the stunt riders and who is doing their own riding?” Impressive sequence nonetheless especially Murtagh (as fellow writer, Ashley, said in her
Live Blog of the episode) “who is sporting Fergus in a Baby Bjorn on his back. Those two. Greenlight the spin-off, please!”

Unfortunately our friend, Rupert, takes a musket ball to the eye in the chase even as Dougal saves the “fat bawl bag” from certain death by literally yanking him back on his horse like he was a rag doll. Some clandestine maneuvers and our crew finds itself losing the Red Coats and stopped for the night at a small chapel. Claire springs into action, removing the musket ball from Rupert’s eye, sewing it up and telling Rupert she’ll get him an eye patch and a parrot and he can be a “proper pirate.” Rupert has no idea what Claire is talking about and says so!
Once again, no rest for the weary…the Red Coats are back! And, this time there appears to be no escape. Claire offers herself up as a hostage despite Jamie offering first to which Dougal uttered what every Outlander widower must say every episode “stop trying to be the hero!” followed by “because you make the rest of us look like a bunch of fops!” It becomes clear that Claire-As-Hostage is the best chance they have to both save the men and eventually find freedom again herself so off Claire goes under escort of the British. Another stellar acting job by our Claire proving yet again that her ad-libbed thespian skills come in handy on occasion. Jamie’s anguish was palpable, however, as Claire was carried off by the Red Coats – again reminding him that a permanent separation may be looming. Dougal’s actions are admirable in this sequence and he seems genuinely concerned about Claire’s well-being. The man is such a dichotomy. Either that or just plain bi-polar. I like Good Dougal…but you are always left to wonder – “how long will it last this time?” Hmmm. Probably not for long.

Claire arrives with the Red Coats to a small town for the night. Entering the pub, Claire notices the broadsheet/Wanted Poster on the door showing a crude drawing of “Red Jamie.” Inside the pub, Claire tries to avoid the creepy stare and suggestive comment of one exceedingly unattractive Red Coat striking up a come-hither pose. No thanks. But little did Claire know that a friend had noticed her arrival – the beggar Hugh Munro. Munro just happened to be there when Claire arrived and he looked on with interest knowing full well this was not where Lady Broch Tuarach was supposed to be – and especially without Jamie in tow. He arranges to “bump” into her on her departure the next morning and Claire is able to tell Hugh where Jamie needs to go to find her. A last minute change of plans re-directs the Red Coats to deposit Claire at Bellmont Estate, the home of a “rich Englishman” who will give Claire refuge. And, no sooner does Claire arrive do we find out who that Englishman is – it’s The Duke of Sandringham (brilliantly acted by Simon Callow) in all his slithery glory. Nice wig, by the way. MUCH better than that monstrosity he was sporting in Paris!

Claire is shocked and nervous that the Duke might reveal her true identity. But, strangely, he does not. Instead he invites Claire to share a drink and some food as he proceeds to spin a tale revealing that he is, in fact, also a prisoner of the Red Coats. Apparently, some of his double dealings on behalf of the Jacobites landed him in the Tower of London not long ago. Not to be trusted, the Red Coats have him under tight watch and he wishes to be liberated. If Claire will agree to ask Jamie to rescue the both of them, then Claire’s secret will be kept. Claire agrees and proceeds to write a note for Sandringham’s messenger to get to Jamie via Hugh Munro. In the meantime, in pops Mary Hawkins, who we last saw in Paris. The Duke reveals to Claire that his “god-daughter” is staying with him prior to her arranged marriage. Ever the opportunist, the Duke has found someone (a British loyalist) more interested in being associated with the Duke then he is about marrying a “soiled” bride. Later that evening, Mary asks Claire for help averting the marriage and Claire pledges to speak to the Duke about Mary’s situation.

In yet another brilliant tete a tete between Claire and the Duke, Simon Callow proves he is one of, if not the most, entertaining and talented actors to grace the Outlander series. The man sucks the oxygen out of the room in every scene and his chemistry with Catriona Balfe is exquisitely juicy. Their dining table scenes in this episode remind me of Claire and Black Jack’s riveting dialogue in Episode 1.06 “The Garrison Commander.” Could it be that the Duke is even more sinister than Black Jack Randall? It would seem so when Claire recognizes the Duke’s valet as the same man who ambushed her and raped Mary in Paris. The Duke confesses that he instigated the attack in order to repay a debt to Le Comte St. Germain, who wanted Claire dead. The Duke thought terrorizing and raping Madame Fraser would be far better so convinced the Comte to accept the plan. Poor Mary Hawkins was just collateral damage. And, oh-by-the-way, the Duke also informs Claire that he has decided that his best bet at this point was to turn in Red Jamie and Claire and therefore gain back the full trust of the English. So, he informs Claire, all deals are off and Jamie will find himself trapped when he comes to Claire’s rescue. The Duke proceeds to lock Claire in her room giving her little opportunity to warn Jamie of the impending ambush.

Back on the road, Hugh finds Jamie and delivers Claire’s note. Much hilarity ensues as Jamie and Murtagh try to read Claire’s broken Gaelic. Murtagh is aghast at Claire’s poor attempt at writing his native tongue noting, “She even misspelled HELP!” I’ve watched the episode multiple times and I laugh OUT LOUD every time at this line. Jamie and Murtagh figure out that Claire is with the Duke and ask Hugh Munro to show them the way to Bellmont Estate. Claire paces nervously in her room but catches a glimpse of a shadowy figure moving through the garden below her window. It’s Hugh Munro! At that moment, Mary Hawkins comes into Claire’s room asking why she was locked in. Claire quickly explains that she needs Mary’s help to warn Jamie of the Duke’s trap. Mary hesitates to follow Claire’s request to go meet “the beggar, Hugh Munro.” Claire has no time to waste so she tells Mary to stay put and be quiet. Claire proceeds through yet another super cool Jon Gary Steele set design – a secret door behind an oil portrait. Really? I need one of those! Claire makes her way to the kitchen only to be surprised by a wig-less Duke having a midnight snack. Claire’s plan to escape foiled, she is forced to sit down once again with the Duke to break yet more bread. The Duke seems morbidly preoccupied with Claire’s connection to the death of Le Comte St. Germain. He’s dying to get all the details and probes Claire on how exactly she managed to kill him. After a few more delectable rounds of dialogue between Claire and the Duke, Mary Hawkins flies into the kitchen only to be admonished by the Duke to “Go to Bed!” Seeing Claire’s face, Mary senses something is wrong and musters the courage to venture out to find Munro. However, just as she does, a British soldier stops her only for him to be hit over the head by the diminutive Hugh Munro and knocked unconscious. Mary quickly relays the message to Munro that there is a trap set and that Claire is in the kitchen. As soon as she does this, Munro disappears and Sandringham’s valet promptly appears and ushers Mary back to the kitchen.

All players assembled it is time for the Highland charge. Jamie bursts into the kitchen. Despite the shock, the Duke has the wherewithal to grab his wig and slip it on. Because, you know, everyone is in love with Jamie and must look their best! Danton, the Duke’s valet, has grabbed Claire and has a knife to her throat. He demands Jamie drop his dirk. Just then, the other half of the dynamic duo enters the scene – Murtagh! The surprise entrance startles the valet and Claire gives him a swift slug to the gut so that Jamie can take him down. Now, the Duke realizes he is between two extremely angry Highlanders and attempts to disassociate himself with the violence in Paris. Claire disputes the Duke’s account of his part in the attack as does the valet. Meanwhile Mary-the-Mouse-No-More has eyed Jamie’s fallen blade and decides to take justice into her own hands – plunging the dirk into the valet with purpose. The Duke whimpers some more as Jamie grabs him by the neck, snatches his wig off and gives Murtagh a wink. Highland justice is swift as the axe falls three horrifying times finally separating the Duke from his head. Murtagh lays the head at Claire’s feet proclaiming his duty is done.

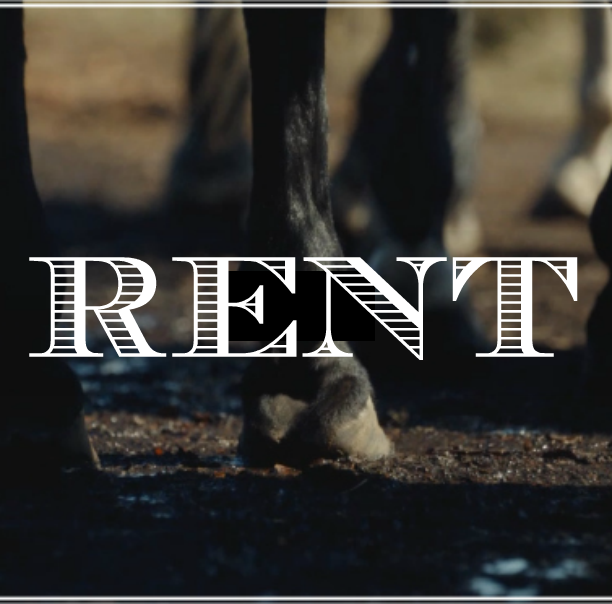
A dizzying 54 minutes and Episode 2.11 ends as our foursome quickly exits the building. Our title card – powdered wig falling to the ground — makes so much sense now, doesn’t it non-book readers? And, I have to say, despite Diana Gabaldon’s humble comments about her role in the writing and production of Episode 2.11, her inimitable style was ALL over the episode. Each character was truly in their zone and the dialogue was swift and smart and funny. It’s what we love about the story of
Outlander and it was on full display in this episode. It’s a treat for those of us who love and appreciate the books to see and hear it come alive on the small screen each week as this epic story progresses. But, to have the author’s own hand personally imprinted on this particular episode makes it that much more satisfying. And for those who are show watchers only, I hope you saw a glimpse of the magnificence that has drawn us all to the story of Outlander. Give the lady props. She deserves it.

What did you think of Diana’s Episode? Are you a book-reader, show-watcher or both? Any thoughts on this Season of Outlander so far?
You May Also Like These Posts


14 Comments
Leave your reply.