Welcome back to our occasional series, “How They Made It,” where we explore the food and drink of Outlander. This time we’re back in Jenny’s kitchen making shortcrust pastry tarts with her and Mrs. Crook. Slainté!
(Note: some of the links on this page can be with affiliates that give me a small commission for my referral at no extra cost to you, and as an Amazon Associate I earn from qualifying purchases.)
Outlander fans’ expressions of passion for the show
One of the many things I love about the Outlander-verse is how we fans find ways to express our passion for the novels and STARZ show through our interests and hobbies. A quick Facebook search will yield an abundance of jewelry, knitted & crocheted items, signs and signposts, and (close to my heart) blogs and recipes (like mine).
Many of these ventures are sanctioned by Diana Gabaldon herself, and sometimes she even contributes to them. Outlander Kitchen, the Official Outlander Companion Cookbook, is one such venture. Theresa Carle-Sanders’ book (and accompanying website) is a love letter to the novels and the food they inspire. I have made many of the tasty dishes between its covers.
Since this is a “How they made it” post, I thought we’d tackle shortcrust pastry, one of the basic culinary building blocks that Jenny at Lallybroch would be able to make in her sleep (and with the number of children running around, I wouldn’t be surprised if she did!).
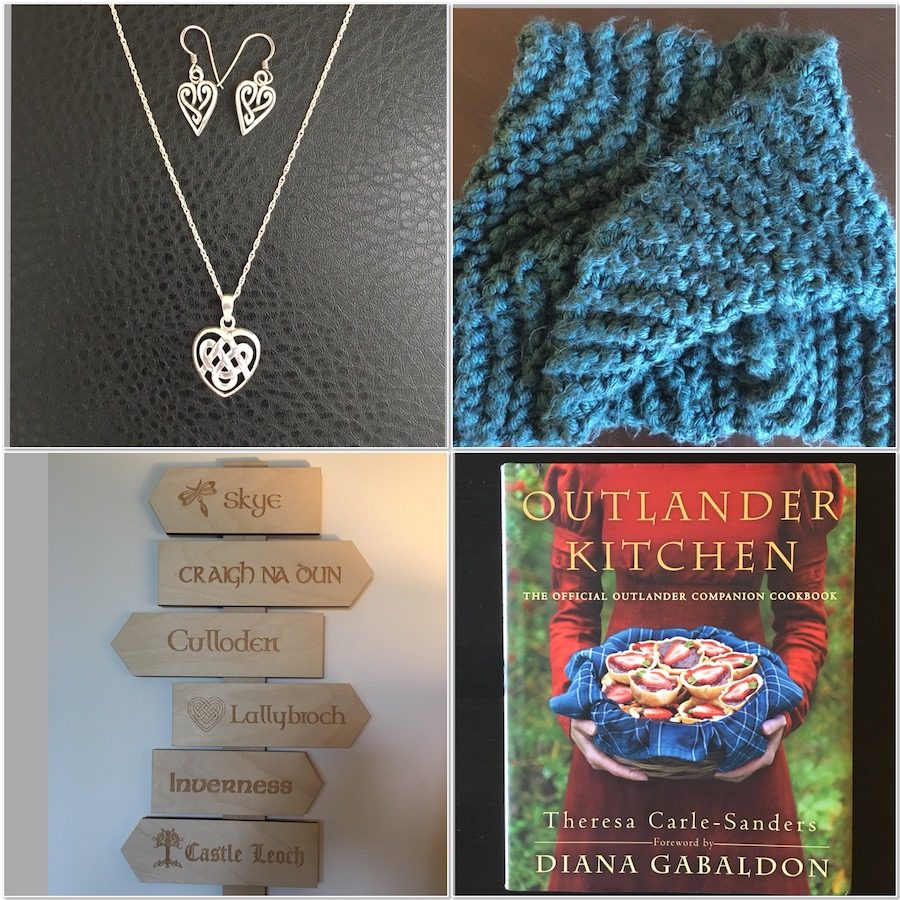
Just some of the ways fans show their passion (and creativity) for Outlander
Shortcrust pastry – enriched pie crust
Shortcrust pastry is the basis for many tarts and pies, both sweet and savory. It’s sturdier and more forgiving than basic pie crust because the dough has egg yolk in it to bind it. Yes, you lose some of the flakiness that traditional pie crust provides, but sometimes the trade-off is worth it.
Remember the Hare Pie Jenny made for Jamie when he was still hiding out in the cave in Voyager? That dish probably had a short crust pastry as a base — the stew filling would benefit from the sturdiness of the pastry.
Not only would Jenny have made shortcrust, but I’m sure Mrs. Fitz at Leoch and Jared’s chef in Paris would have used the same technique for many of their tarts and stuffed pastries.
What you need
The fat used in making shortcrust dough could be butter (my choice), vegetable shortening (like Crisco), lard (many people’s choice), or something else entirely. I’ve seen recipes with coconut oil (to make it vegan), and I’ve used rendered beef or chicken fat on occasion (for savory dishes).
Adding a little bit of acid (lemon juice or vinegar) helps tenderize the dough. Don’t worry, you won’t be tasting it so which you choose won’t matter.
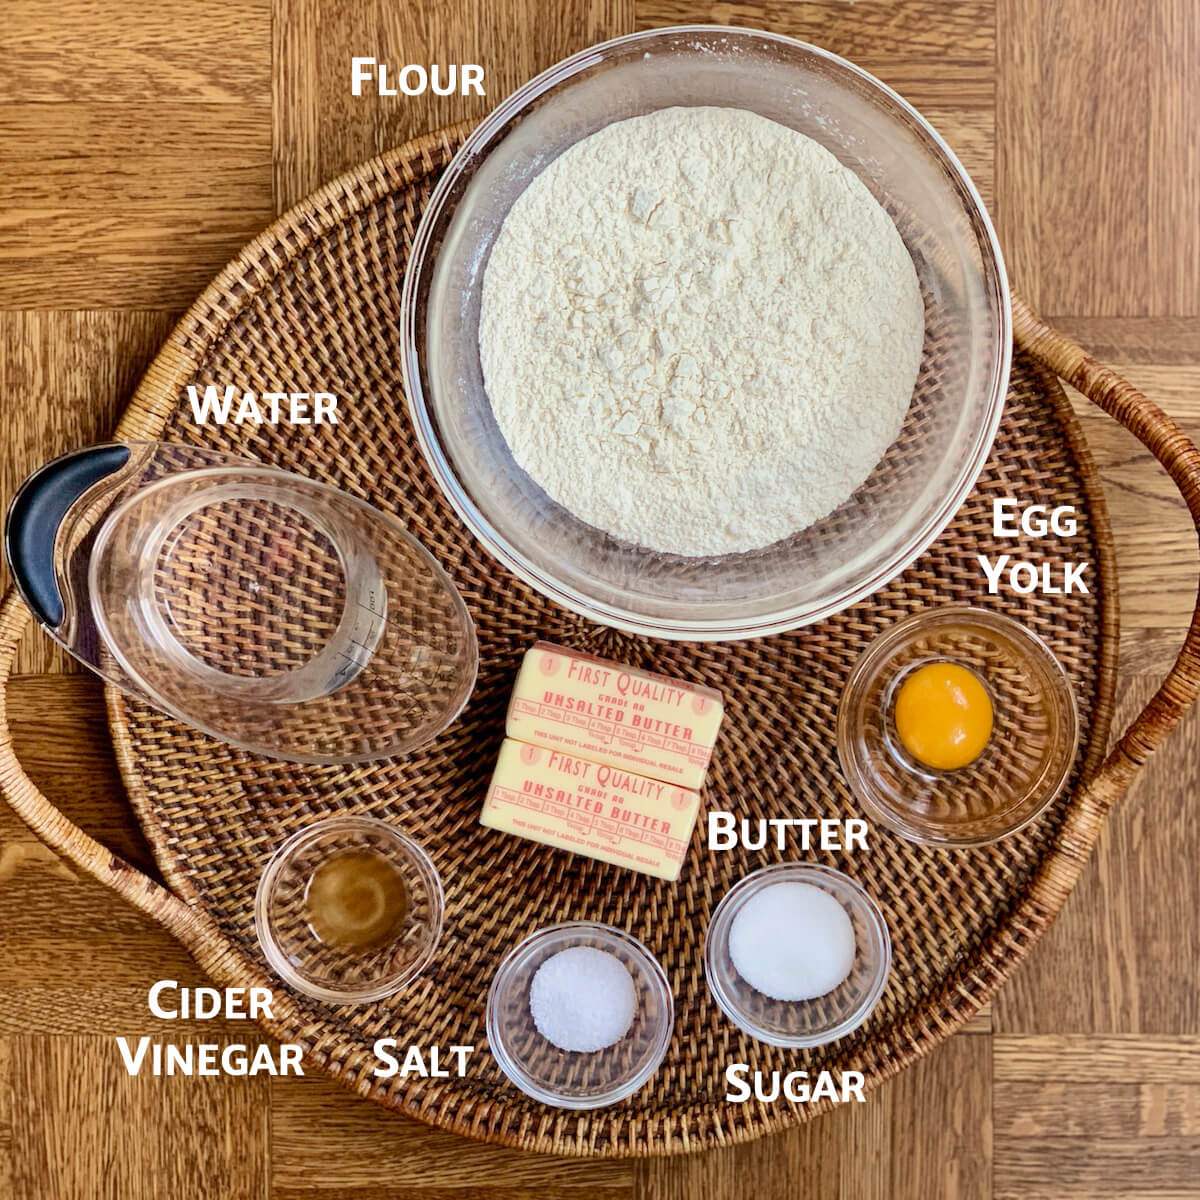
All the items you need to make a flaky and sturdy shortcrust pastry
Helpful tips for making shortcrust
The recipe for shortcrust pastry dough exactly mimics that of pie dough (no surprise there).
Mix flour and salt (and sugar if you’d like), then cut in butter to form pea-sized clumps.
I like to toss the butter into the flour mixture as I grate it. That way it doesn’t turn into a big blob of butter that you then have to cut in.
You can use a standing mixer fitted with the paddle attachment or a food processor to make the dough. Just be mindful to pulse the ingredients quickly and don’t overwork it.
You want that butter to stay cold and to keep the flour from developing too much gluten so the crust will be flaky.
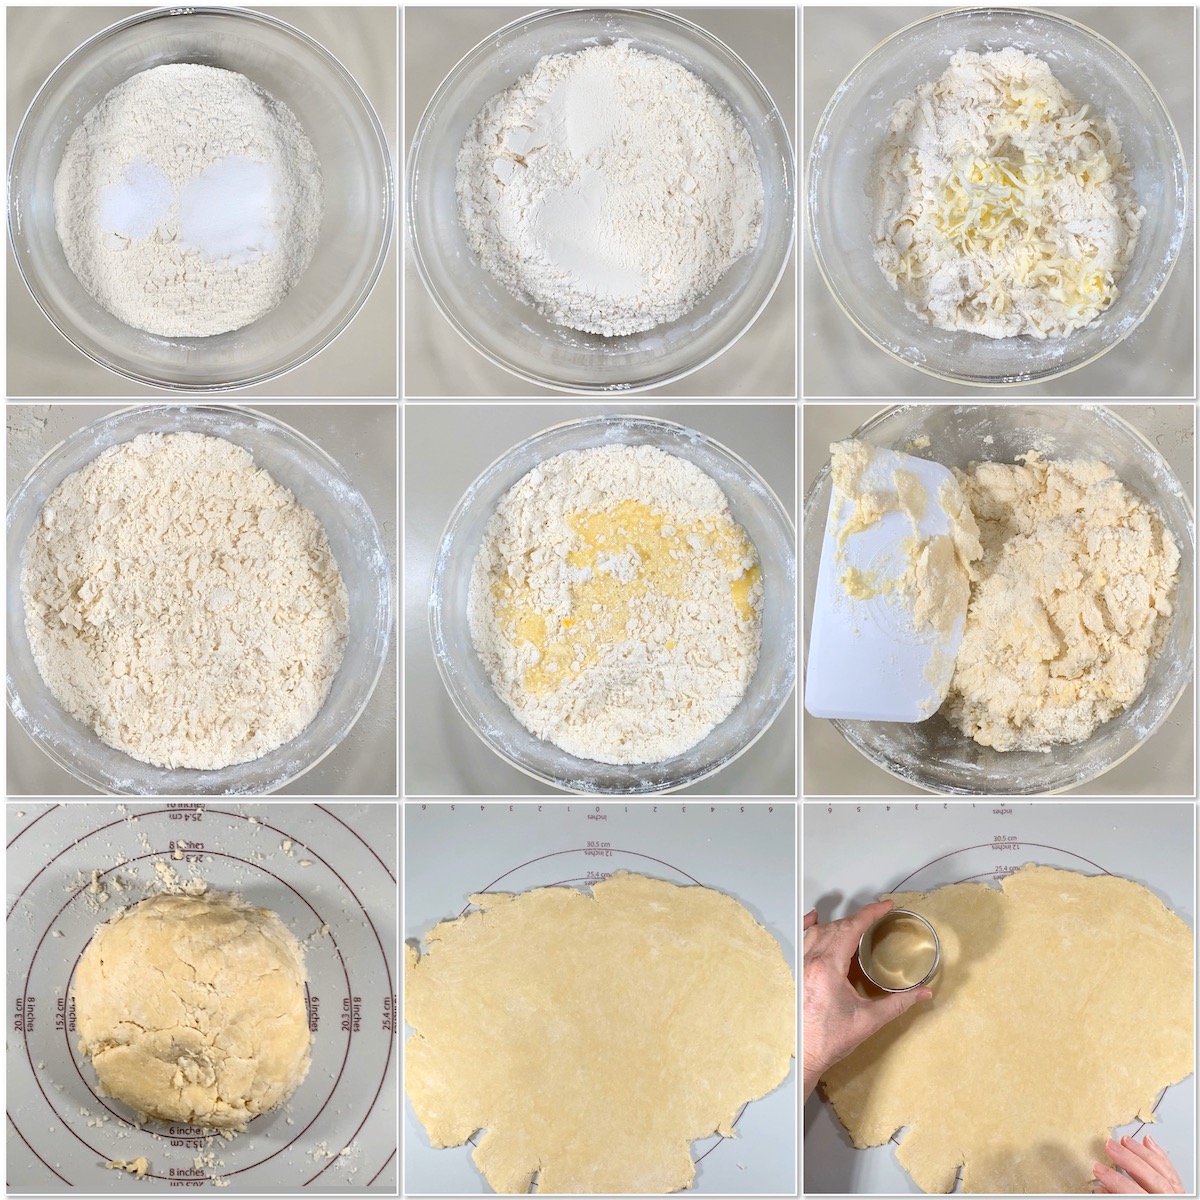
Whisk the egg yolk and lemon juice or vinegar into the water, then fold the liquid into the flour mixture until you get a shaggy dough. Turn the dough out onto a pastry mat and give it a quick kneading to bring it all together.
Squeeze a small amount of dough between your fingers and if it is very crumbly, add ice water, 1 tablespoon at a time (2 tablespoons maximum).
Shape the dough into discs, cover with plastic wrap, and chill for at least 1 hour or up to overnight. You want that butter to get cold again from all that manipulation.
When the dough is chilled, roll it out and use it on whatever pan your recipe requires.
How thick should I roll out the dough?
The best way to roll out shortcrust dough is to use even pressure and roll out from the center in all four compass directions, north, south, east and west.
Turn and loosen the dough occasionally as you continue to roll the pastry out into a circle or square shape (unless, like me, you end up with a blob-shape).
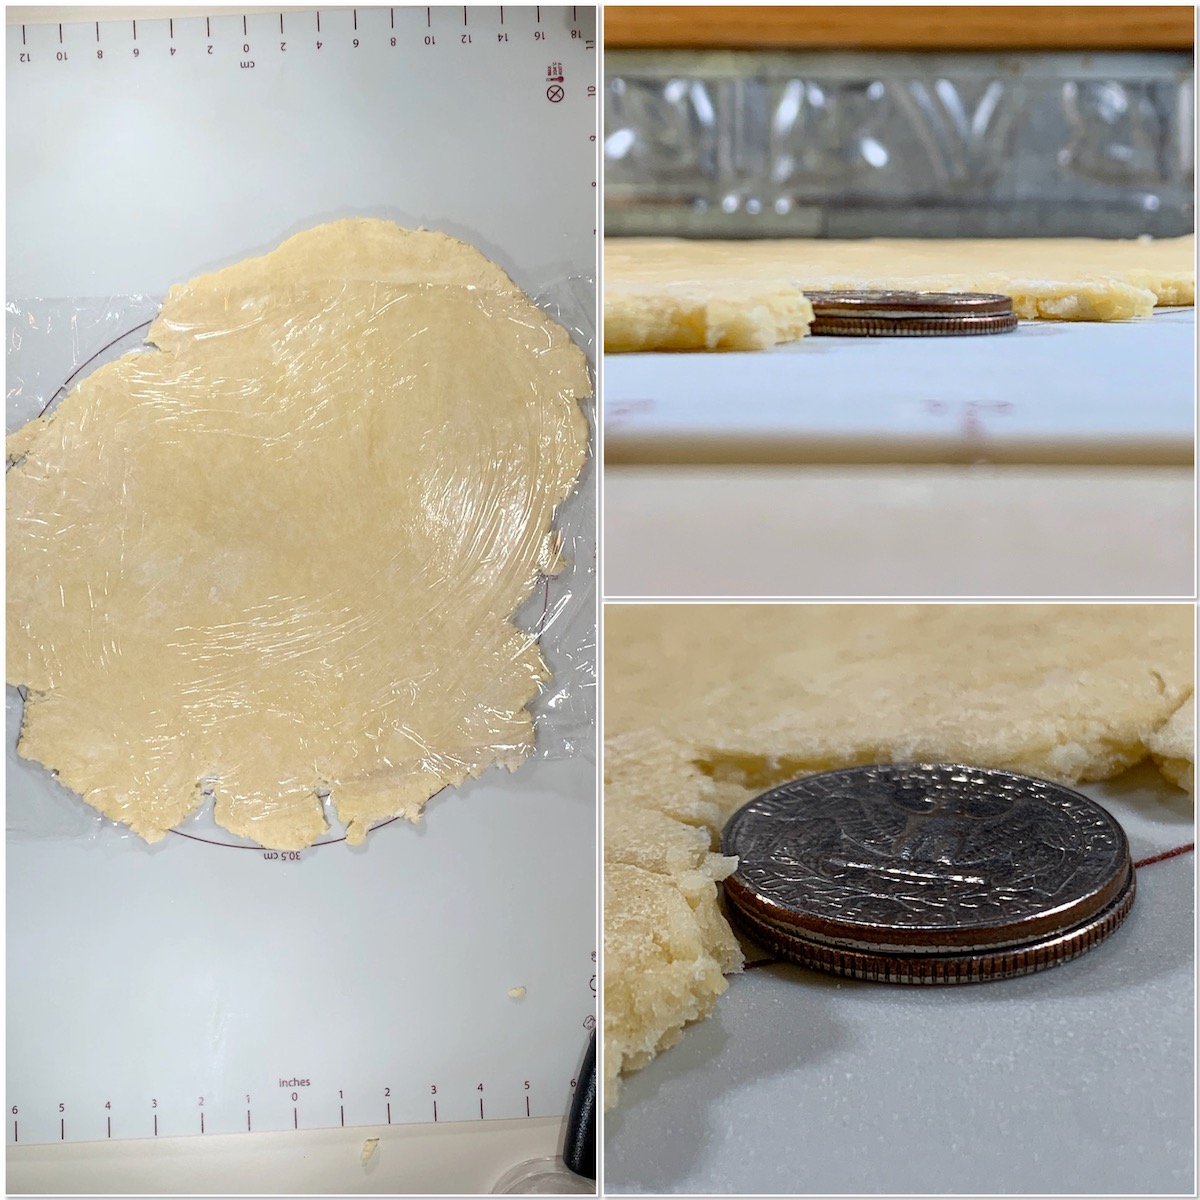
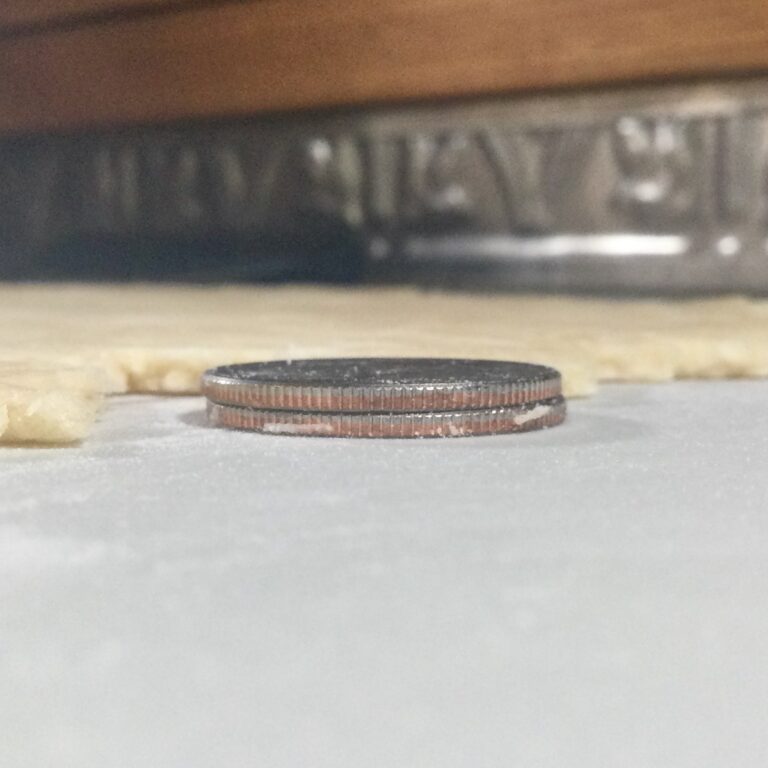
A good thickness starting point is approximately ¼-inch thickness, about the height of two stacked quarters. You can go thicker or thinner based on your recipe.
How to blind bake your shortcrust pastry without pie weights
Here’s a trick I learned from Smitten Kitchen to successfully blind bake pie dough and shortcrust pastry. Freeze the crust in its pan tightly covered in foil.
You don’t need to use pie weights or dried beans using this frozen-foil method.
- Tear off a piece of foil that fits over the entire pan with overhang (or add extra foil as needed).
- Spray the foil with baking spray to keep it from sticking to the dough.
- Press the foil into the pan and tightly up against the sides. Bring the foil up over the rim and mold it to the sides of the pan.
- Freeze the crust for 15 minutes.
- Bake the crust with the foil on for 20 minutes. At this point the crust is par-baked.
- Carefully remove the foil from the crust. If the crust has puffed up, gently press it back down. Any tears or cracks in the crust can be repaired with dough scraps. Return the crust to the oven and bake the crust until golden brown, 5 to 10 minutes more.
There you have it. No more slumping sides or messing around with dried beans.
I’m all in for that!

How to make mini tartlets
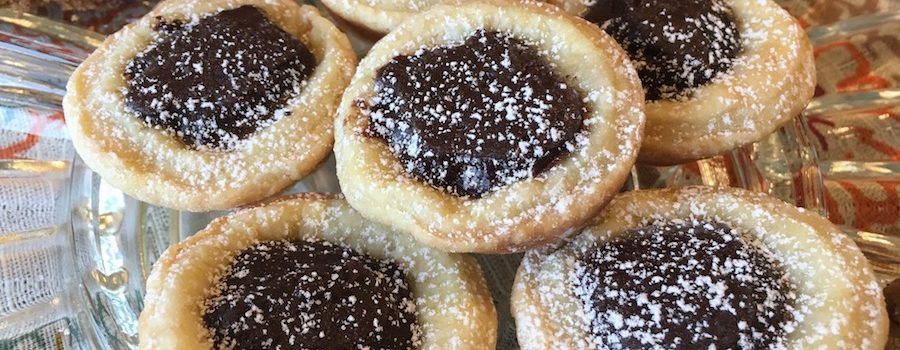
Mini tarts (aka tartlets) are the younger sister to the full-size version — cute, two-bite treats that are perfect for parties. I recently made these sweetened tart shells using the recipe from the Outlander Kitchen cookbook, then filled half with homemade lemon curd and the rest with dark chocolate ganache.

Mini tart shells before & after baking
Mini tartlets just require you to individually cut them out. You’ll need some special tools, like a mini muffin pan and a pastry dough tart tamper to help with the process.
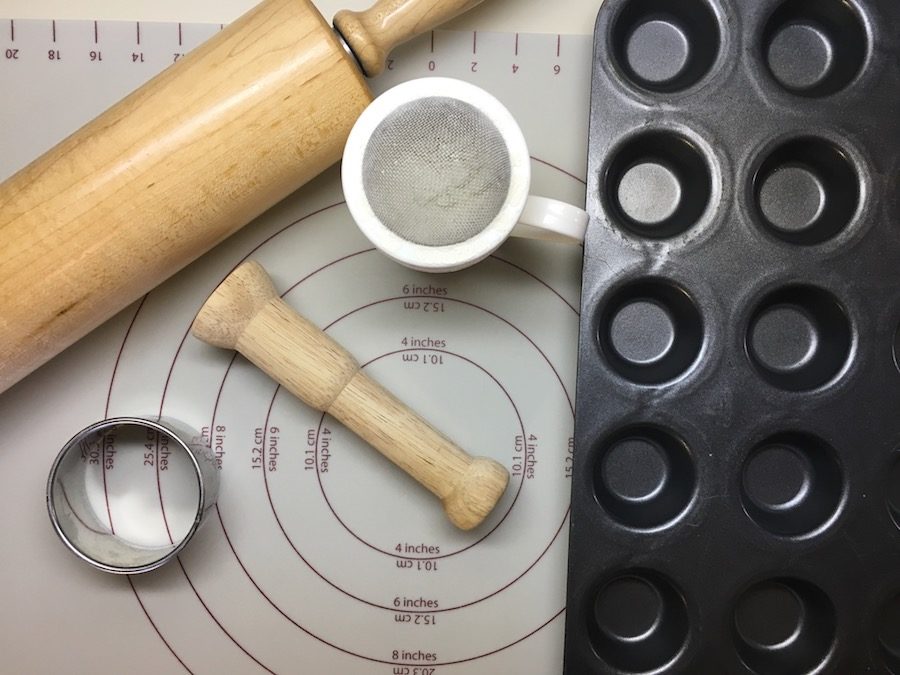
These tools are useful in making the mini tarts: a pastry mat, rolling pin, biscuit cutter, dough tamper, flour shaker, and mini muffin pan
Steps for pressing mini tartlets
- Use a 2½ inch round cutter to cut out the circles
- Lay the dough circle flour side down over the hole in the muffin pan
- Lightly flour the end of the tamping tool, then press the tamping tool over the circle of dough into the well of the muffin cup, wiggling it slightly to release
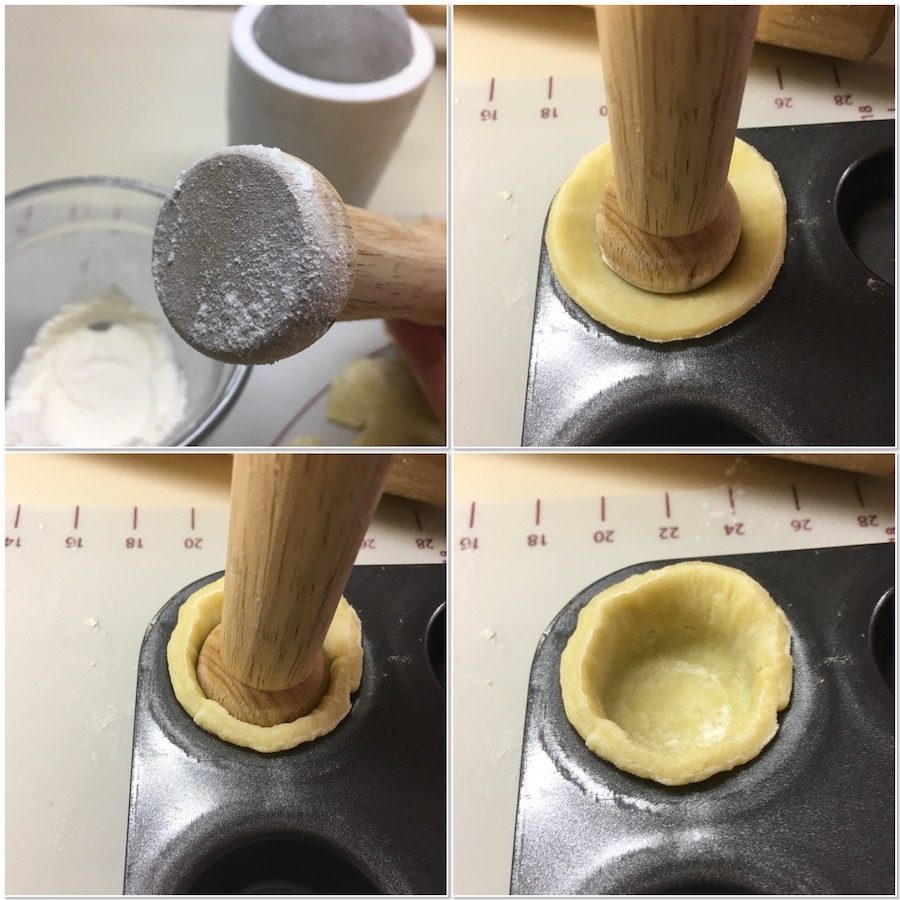
Flour the end of the tamper, than press the dough into the muffin cup
- Cut out as many of the circles as you can before you re-roll the scraps
- Let the trays chill in the refrigerator for at least a half hour before baking. You don’t want slumping tart shells!

Re-roll your scraps and keep filling those muffin cups
- Prick the dough a couple of times before putting the trays in the oven (that way the shells won’t puff up)
- You can fill with a filling that needs to be baked as indicated in the recipe (like butter tarts or mini pumpkin pies) or blind bake at 375°F for 10-15 minutes (or until light golden brown) for chilled fillings (let the baked shells cool completely before filling)
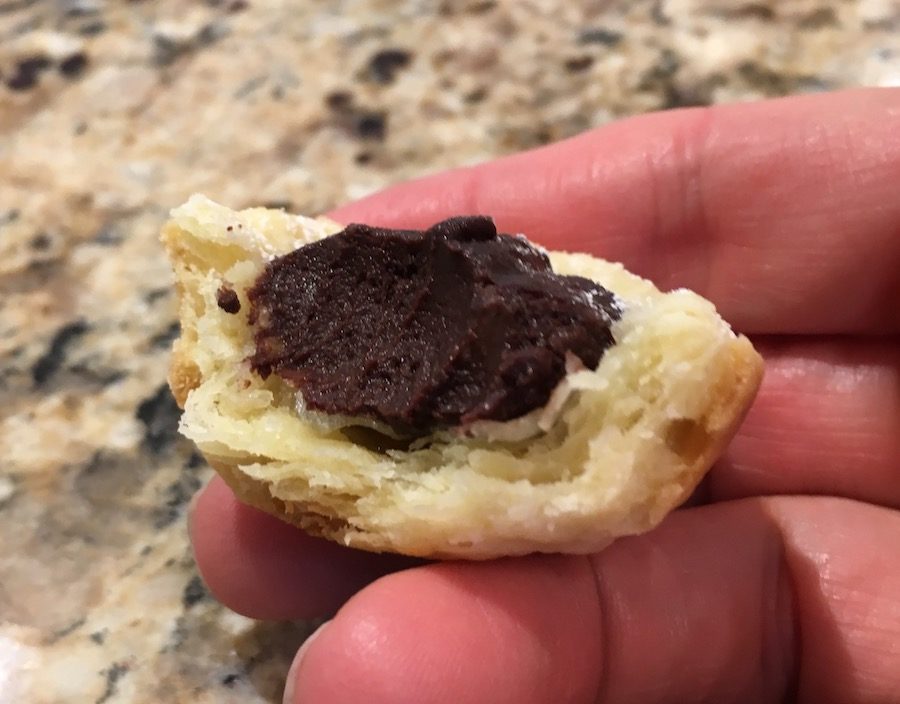
A two-bite Chocolate Ganache Tart made with short crust pastry…yummmmm
You can make these mini treats, too! Don’t worry, the steps are easy to master (as I said, short pastry crust is quite forgiving)…just follow the tips and tricks provided, and you’ll soon have versatile tart shells of your own to fill as you please.
However you express your love of Outlander, there will be many of us waiting to admire and share your passions.
What is your Outlander-inspired passion or hobby? We want to know and if you have a website be sure to include it in your comments!
Basic Shortcrust Pastry
Special Equipment
- kitchen scale
- pastry blender
- rolling pin
- baking spray
Ingredients
- 3 1/3 cups all-purpose flour, (14 oz, 397g)
- 1 Tbsp granulated sugar, optional (½ oz, 15g)
- 1½ tsp kosher salt
- 1 cup butter, chilled, cut into small cubes (8 oz, 227g)
- ½ cup ice water, (4 oz, 113g)
- 1 large egg yolk
- 1 tsp lemon juice, white vinegar, or apple cider vinegar
Procedure
- Measure your ingredients using a kitchen scale. It's the most accurate and will give the most consistent results.
- In a large bowl, stir together the flour, sugar (if using), and salt.
- Grate the frozen butter with a box grater and toss it directly onto the flour mixture, mixing it up as you go. After all the butter is grated, use a pastry blender to cut it into the flour until coarse, pea-sized crumbs appear. Set aside.
- Whisk the ice water, egg yolk, and lemon juice or vinegar together. Add to the dough and mix until the dough just holds together (here you have to be flexible about the amount of water to add as the actual amount will depend on the humidity of the day). Squeeze a small amount of dough between your fingers and if it is very crumbly, add more ice water, 1 tablespoon at a time (2 tablespoons maximum).
- Do not over mix the dough (you want to keep that butter cold and separate from the flour). Don't worry if the dough has a slight lemony or vinegary smell...that will dissipate during baking and/or be overwhelmed by the filling.
- Turn dough out onto a lightly floured surface and push together into a rough ball. Knead a few times to combine, then divide into two equal balls (if making a tart, leave whole). Flatten each ball into a disc with smooth edges (no cracks), cover with plastic wrap, and refrigerate at least 1 hour or up to overnight. If you refrigerate the dough for more than 30 minutes, you may have to rest it for a few minutes at room temperature before it will be soft enough to roll out.
- Lightly dust your rolling surface with flour. Use even pressure to roll the dough out front to back and on the diagonals. Turn and loosen the dough occasionally as you continue to roll the pastry out into a circle about 2 inches larger than your pan with a thickness of approximately ¼-inch (about the height of two stacked quarters), unless otherwise directed by your recipe.
- Transfer the dough to the pan you're using. Ease the crust into the pan, pressing up on the sides and leaving the dough overhanging the rim.
- For a tart pan: Use your rolling pin to roll over the rim to create a neat edge.
- For a pie pan: Trim the overhang to 1-inch, then turn the overhang inward and crimp as desired.
- Continuing: Save the dough scraps to repair the crust later if needed. Prick the bottom all over with a fork.
- To blind bake the crust: Preheat the oven to 375°F. Tear off a piece of foil that fits over the entire pan with overhang (or add extra foil as needed). Spray the foil with baking spray to keep it from sticking to the dough. Press the foil into the pan and tightly up against the sides. Bring the foil up over the rim and mold it to the sides of the pan. Freeze the crust for 15 minutes. You don't need to use baking beads or beans using this frozen-foil method.
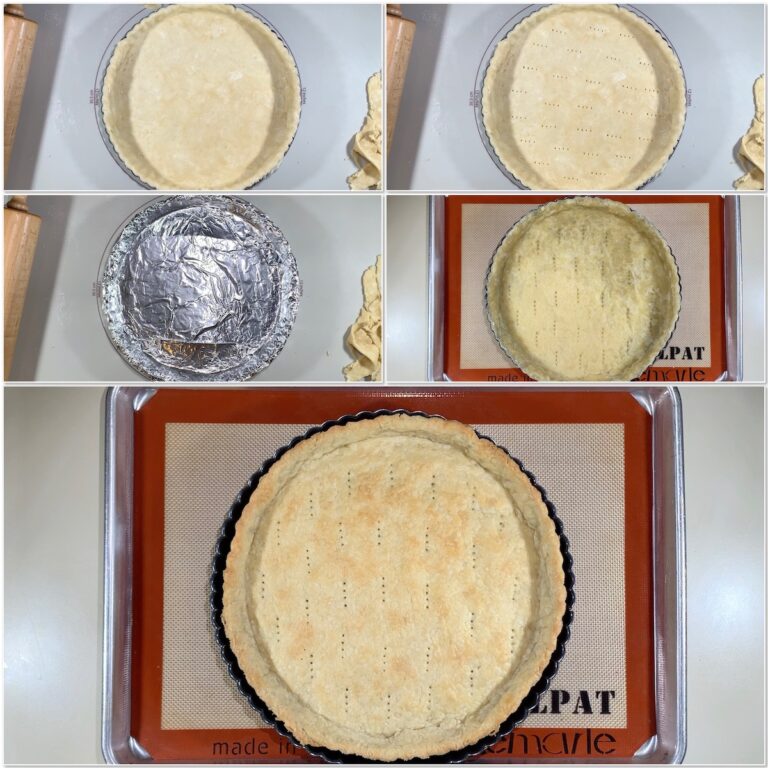
- Bake the crust with the foil on for 20 minutes. At this point the crust is par-baked.
- Carefully remove the foil from the crust. If the crust has puffed up, gently press it back down. Any tears or cracks in the crust can be repaired with dough scraps. Return the crust to the oven and bake the crust until golden brown, 5 to 10 minutes more.
Recipe Notes
Discovering Outlander after Season 1 first aired, Tammy quickly went down the rabbit-hole on social media and podcasts and found a world of like-minded fans who not only tolerated her obsession, but encouraged the madness! She combined her Outlander-inspired interest for scotch whisky with her continuing passion for baking and storytelling in her blog, Scotch & Scones…Explorations in a glass and in the oven. Joining the staff of Outlander Cast as the resident baker has brought Tammy full circle, from a podcast fan to a contributing writer. You can follow her on Twitter, Instagram, and Pinterest at @scotch_scones, and find her on Facebook at @scotchandsconesblog.






2 Comments
Leave your reply.