Welcome to our occasional series, “How They Made It.” We’re baking bannocks the way Mrs. Fitz in Outlander would, then updating them to the present day.
(Note: some of the links on this page can be with affiliates that give me a small commission for my referral at no extra cost to you, and as an Amazon Associate I earn from qualifying purchases.)
What are bannocks?
I had never heard of bannocks prior to discovering Outlander, but once I had I was intrigued. How did they taste? Little did I know the can of…uhm…oats I had just opened! It seems there are as many recipes for bannocks as there are cooks, and not just Scottish cooks neither. Bannocks are claimed by the First Nations peoples of Canada among others, and almost every cuisine around the world makes some form of a flat grain-based bread. I explored bannocks early on in my own blog, Scotch & Scones, from the perspective of what they were and how I could tweak the recipe a little (for the record, I used unfed sourdough starter as a base). For our purposes here I want to explore the difference between how bannocks would have been made at Castle Leoch and how they’re made today. Let the “Battle of the Bannocks” begin!
[Side note…I like alliteration. Remember the Great Butter Bake-Off Battle where we compared shortbread made with US vs. Irish butter? Me, too. Good times.]
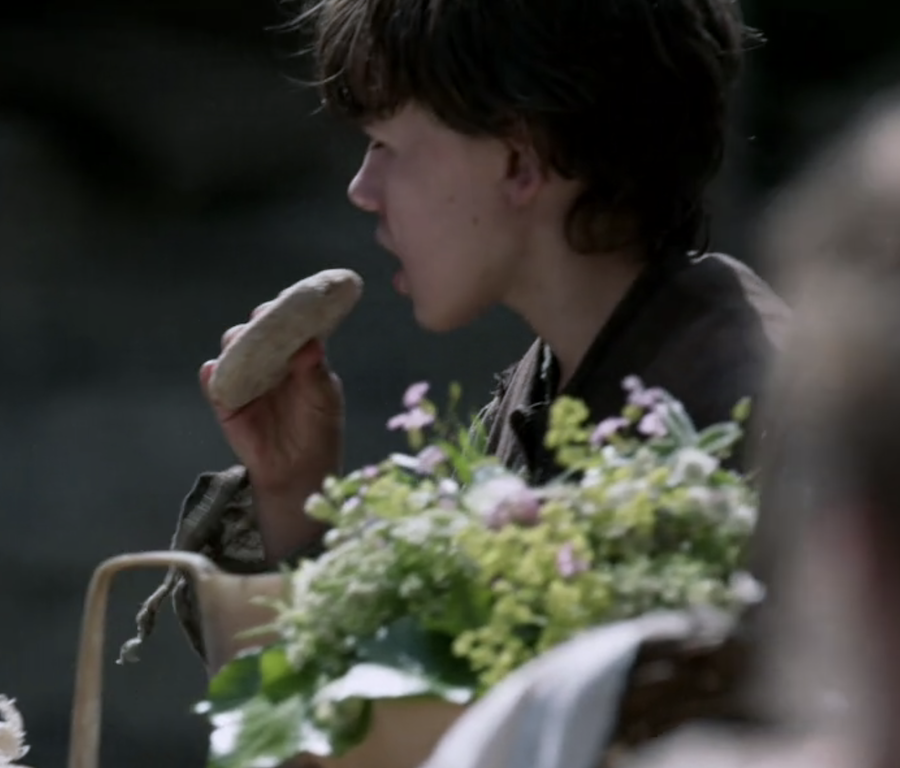
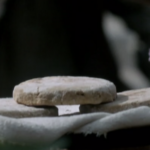
Rabbie McNabb tried to sneak a bannock at Lallybroch (photo credit: Outlander STARZ)
Bannock recipes abound
As I was saying, there are many, many bannock recipes, and it’s hard for this California girl to know which would produce an authentic 18th century Scottish bannock (the type Mrs. Fitz would have made), let alone a modern version. Most of the recipes I found online used some form of leavening (usually baking powder), which I didn’t think would have been around then.
Also, are bannocks supposed to be hard, thin, and brittle? Soft, thick and chewy? Somewhere in between? Looking at the picture above from Season 1 Episode 9 (and yes, I know it’s Lallybroch instead of Castle Leoch, but it’s the example from the show that I found), a bannock looked like the size of a large cookie, and was thick as well.
Lots of online recipes, however, described something thinner and smaller. Thoroughly confused, I decided to use Outlander Kitchen’s recipe for Jocasta’s “Auld Country” Scottish Bannocks simply because Theresa Carle-Sanders did her homework, and she said that this version would be something Jocasta Cameron (née MacKenzie) would have eaten when she was at Leoch.
For a modern take, I settled on the recipe from The Guardian’s How to cook the perfect oatcakes because Felicity Cloake compared all the factors that go into a good oatcake and distilled them into a single recipe.
A note about terminology
Even Claire mentioned that “Britain and America are two nations divided by a common language,” and I realized that comment applied here as well. In the US, “oatmeal” refers to rolled or steamed oats, the stuff with which you make, well, oatmeal. When I made bannocks for that Scotch & Scones post I mentioned previously, that’s what I used — whole rolled oats.
However, while researching this post, I realized that in Britain “oatmeal” refers to “oat flour,” i.e. ground up oats (that would explain why my previous attempts at bannocks were so chewy!). Rolled or steamed oats are called “porridge oats” in Britain, and our “steel-cut oats” are “pinhead oats” there.
The sum total of this realization was that I needed to grind up the rolled oats I used into a sort of flour before making the bannocks. The things you learn…
As always, I’ll note in italics my comments and any changes I made to the recipes.
Bannocks from the 18th century
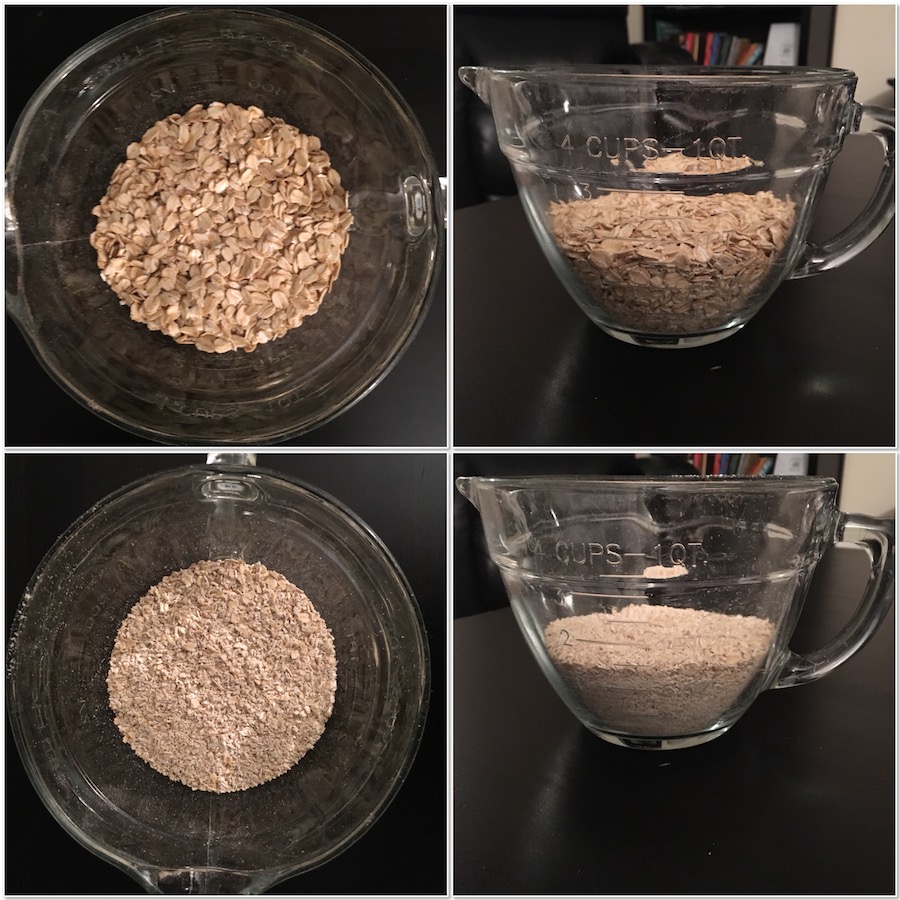
So oatmeal = porridge oats (top row) & oat flour = oatmeal (bottom row)…who knew?

The ingredients that go into the humble bannock
(Side Note: After this post was written, Theresa Carle-Sanders updated her online version of Jocasta’s “Auld Country” Scottish Bannocks to reflect the recipe published in her Outlander Kitchen cookbook, changing some of the ingredient amounts and the procedure to make the bannocks. I’ll leave you to decide which version to make…I’ll stick with biscuit method myself.)

Mixing up a batch of bannocks ala Mrs. Fitz (does that dough look right to you?)

Cooking the bannocks on the stove…is it a bannock or just a burnt blob?
The making of a modern bannock
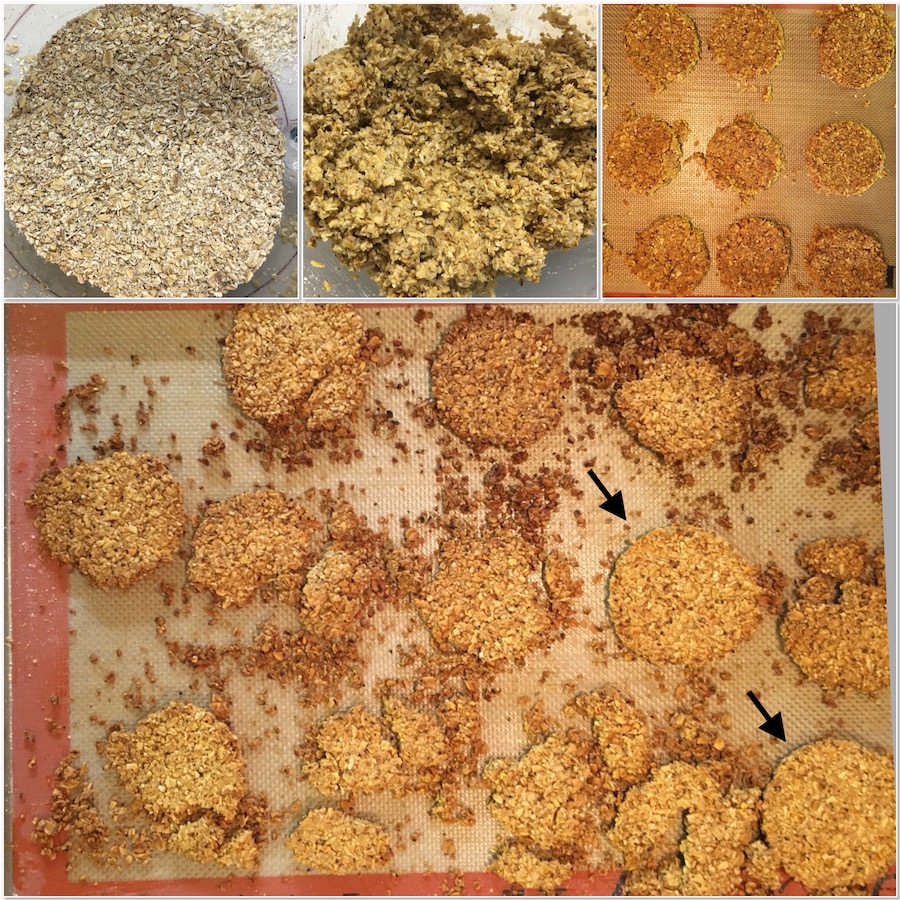
The making of a modern bannock (top row) lead to baked…crumbly stuff. Oh wait, there were a couple that survived!
Results: old vs. new bannocks
Again, I want to stipulate for the court that I haven’t eaten bannocks in Britain, so I don’t know how they should taste…I’m just going by the pictures I’ve seen.
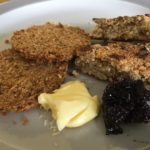
Tasting the vintage recipe bannocks, the outside was firm, the inside was less so (although I don’t know if that meant I undercooked them). They held together (a definite plus), were bland at first but then the salt kicked in and I could taste the butter. Overall, I like the texture better using ground rolled oats than the way I made them in the past.
As for the modern recipe version, the couple that survived baking almost intact were crumbly, nutty, slightly sweet, with a crunchy texture from the pinhead/steel cut oats…in other words, really tasty. However, while the flavor was definitely more pronounced, their lack of any cohesion was a disappointment. Maybe making them thicker and using more water would have helped? I’m not sure. I did find a use for them though (see the picture below).

Bannock crumbles as part of this nutritious breakfast of yogurt, blueberries, and maple syrup

Side by side, which bannock will emerge the victor?
So for me at least the winner of the “Battle of the Bannocks” definitely went to Mrs. Fitz and Outlander Kitchen. I could see putting these bannocks in a saddlebag and heading out to collect rent (assuming I could get the shape right). Their lack of overt flavor lent them to feature the butter and jam with which I tasted them, and I could also see eating them with smoked salmon and blue cheese. Maybe the next time the modern bannocks will come out better because that toasted flavor was really nice. I’m open to suggestions on how to up my bannock-baking game…just remember the language barrier!
Do you have a time-honored recipe for bannocks? A fool-proof technique for keeping the dough together? What do you eat bannocks with? So many questions…hope you’ll answer below so we all can learn!
Jocasta’s “Auld Country” Scottish Bannocks
Special Equipment
- food processor
- pastry blender
- cast-iron pan
Ingredients
- 1 cup rolled oats, (3½ oz, 100g)
- ¾ cup barley, see Recipe Notes
- ½ tsp kosher salt
- 2 Tbsp butter, room temperature, cubed (1 oz, 30g)
- 1/3 cup milk, room temperature (3 oz, 85g)
Procedure
- Grind the oats to meal by pulsing them 4 or 5 times in a blender, food processor, or clean coffee grinder. Repeat with the barley. (The meals will have some coarser bits to them but should be relatively fine). Set aside ¼ cup of the ground oats for working the dough. (I used my food processor to make my flour, and it worked pretty well)
- Mix the remainder of the 2 freshly ground flours together with the salt. Cut the butter in with a pastry blender or 2 forks until the mixture resembles coarse sand. A few pea-sized lumps of butter are okay. (I found this method interesting because this implies that a bannock is basically an unleavened oat flour biscuit, just using room-temperature rather than chilled butter)
- Stir in the milk — you should have a very wet dough, but not soupy (add a little more milk if the dough is too dry). Cover the bowl with a clean tea towel and set aside for 15 minutes to allow the grains to absorb the milk.(Here is where I think I went wrong…my dough was wet but probably not wet enough. A picture of what the dough should look like would have been helpful)
- Preheat a cast-iron pan over medium-low heat for 5 minutes.
- Turn the dough out onto the counter dusted heavily with the remaining ground oats. Dust the dough with more oat flour and knead it gently 5 or 6 times. Then, being careful not to overwork the dough, gently pat into a round disc about ½” thick. (My dough was already crumbly & hard to hold together…I should have added more milk)
- Dust each side lightly with oat flour, mark a cross into one side of the bannock with the handle of a wooden spoon, then carefully transfer it to the dry cast iron pan. Cook until golden, about 15 minutes. Flip and cook until golden on the second side, about 10-15 minutes. (I think my stove was too hot at first as I burnt the first side after about 8 minutes. Flipping it over also proved to be a challenge as the bannock started to break. Overall, I cooked the bannock for about 12 minutes total.)
- Cool on a rack for 5 minutes before cutting into 8 wedges. (Uhm…how do you cut a blob-shape into 8 wedges?)
Recipe Notes
The Perfect Oatcakes
Special Equipment
- half sheet baking pan
- Silpat silicone mat or parchment paper
- rolling pin
- 2½-inch round cookie cutter
Ingredients
- 1 cup medium oatmeal (and by this she means oat flour), plus extra for dusting (7 oz, 200g)
- ¼ cup steel cut oats, pinhead oatmeal (1½ oz, 50g)
- ¼ cup rolled oats, porridge oats, see Recipe Notes (¾ oz, 25g)
- ¼ tsp kosher salt
- ¼ tsp brown sugar
- ½ tsp baking powder, see Recipe Notes
- 5 Tbsp butter, cubed, see Recipe Notes (2½ oz, 75g)
- ? cup water (¼ cup + 1 Tbsp), boiling (2½ oz, 75g)
Procedure
- Heat the oven to 400°F (200°C, gas mark six). Mix together the oatmeals and oats and spread out on a half sheet baking pan lined with a Silpat silicone mat or parchment paper.
- Bake for about 15 minutes, shaking the tray occasionally, until they start to smell toasted. (I liked the idea of toasting the flours before baking to amp up the flavor, but I didn’t realize at the time the effect it would have on the brittleness of the final product.)
- Pour into a mixing bowl and allow to cool slightly, then whisk in the salt and sugar. Stir the butter into the boiling water until melted, then stir this into the oats to make a sticky mixture. If it seems too wet to hold together, add a little more of the medium oatmeal, but it should be quite damp. (The dough was damp, but was it damp enough? I really didn't know then, but probably not.)
- Dust a work surface with medium oatmeal and put the mixture on there. Pack together well and flatten or roll out with a well-dusted pin until it is about ¼-inch thick.
- Cut out rounds of the size of your choice, then use a spatula to carefully lift each one on to the tray, still in the cutter as they will be fragile. Space them out well and re-roll any scraps until all the mixture is used up. (I rolled these as indicated and used a 2½-inch round cookie cutter, and boy, were they fragile…I couldn’t even get them to the tray without crumbling! My theory is that toasting the oat flour dries it out, so it’s really going to absorb the water added.)
- Bake for 20 minutes, then very carefully turn them over and bake for 10 more minutes until they feel hard and dry on both sides. (My baking time wasn’t even close to that 20 minutes...it was more like 10 minutes on the first side and 5 minutes on the second. Turning them also proved to be disastrous. I did like that my kitchen smelled nutty as they were baking, though.)
- Gently transfer to a wire rack to cool, then store in an airtight tin. (Gently transfer, indeed...only 2 made it without breaking up.)
Recipe Notes
Discovering Outlander after Season 1 first aired, Tammy quickly went down the rabbit-hole on social media and podcasts and found a world of like-minded fans who not only tolerated her obsession, but encouraged the madness! She combined her Outlander-inspired interest for scotch whisky with her continuing passion for baking and storytelling in her blog, Scotch & Scones…Explorations in a glass and in the oven. Joining the staff of Outlander Cast as the resident baker has brought Tammy full circle, from a podcast fan to a contributing writer. You can follow her on Twitter, Instagram, and Pinterest at @scotch_scones, and find her on Facebook at @scotchandsconesblog.






11 Comments
Leave your reply.